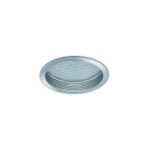
Shop Our Catalog For: Commercial Indoor Lighting
 A professional must always be used in cases of installing high voltage lights, but low voltage outdoor lights are designed for the weekend landscaper in mind to put up around his home on his own. By illuminating the exterior of a home at night, it steals away from criminals places that they might hide. This security aspect is one of the reasons people seek to put up outdoor lighting system. If such is the case, instead of highlighting plants, the lights should brighten areas near entry-ways and windows. For optimum security, large, leafy bushes ought to be planted away from the house, and they should be well lit, too.
Security purposes often lead people to put up landscape lighting. By eliminating as many nightly shadows as possible, the home and its occupants can be made safer. Perhaps the most common type of outdoor low voltage lights used for security are floodlights. These inexpensive lights, when properly placed high enough, can cast a very large beam for a minimal amount of energy use. Like other outdoor low voltage lights, they are sold in high or low voltage. Installation of low voltage flood lights is simple enough for anyone, which is another reason behind their popularity for home security use. Some homeowners might prefer security lighting that is easier to tailor to the needs of their yard. Motion detector lights turn on automatically in response to movement.
They can reveal a criminal moving around in the shadows of the house. Since they are only on when needed, they can be more energy efficient than other types of continuous lighting. This makes them easily customizable to light up a specific area for security. Low voltage path lights can illuminate the walkway as the owner approaches the door. By illuminating the exterior of a home at night, it steals away from criminals places that they might hide. If such is the case, instead of highlighting plants, the lights should brighten areas near entry-ways and windows. Another option for lighting entryways are porch lights. These brighten the area near the door continuously, but they are often available in many decorative styles to suit the tastes of the homeowner.
Low Voltage Landscape Lighting
Most landscape lighting is designed to be hidden, either in trees, beneath bushes, or along pathways, but there are pieces that are created to be works of art both during the day and at night. Since they will only be lit at night, there should be allowances given for when they are seen during the day. The placement of decorative outdoor low voltage lights is very important. Commonly seen decorative outdoor low voltage lights are outdoor wall scones. They have a lot in common with their interior wall cousins. Neither require extensive electrical knowledge and can be installed by the homeowner with ease. Wall scones come in a wide array of styles and décor types, which makes them popular choices to be used in pairs as porch lights. Other options for using outdoor low voltage lighting for decorating include post lamps. These require a bit more knowledge of wiring in order to set up from scratch than simple wall scones or wall lanterns. Most designers recommend that an experienced electrician is consulted when post lamps are planned to be placed. A homeowner has to carefully consider the fact that because a post hole must be dug for a pole lamp, it will be much more difficult to move in case he does not like its placement. Stylishly crafted pole lamps, though, create a professionally landscaped look to any yard, even one planned by an amateur. For this reason, many home landscapers decide to install them in their own yards, despite the hassles of installation.
Outdoor low voltage lights and barbeque lights are options that should be considered for any homeowner. With the myriad of outdoor low voltage lights products available, the possibilities are endless. If you need help selecting an outdoor landscape lighting fixture or just want to talk about low voltage landscape lighting, just call us our lighting designers are standing by to assist you!
